

[Flutter] 从安卓与 iOS 包体优化到一键自动打包脚本的一条龙服务
sugoodz sugood 2022-03-15 17:50:35 +08:00 3072 次点击这是一个创建于 1367 天前的主题,其中的信息可能已经有所发展或是发生改变。
系统信息
- System version: MacOS 12
- Flutter version: 1.22.5
- Dart version: 2.10.4
- Android Studio version: 4.1.1
介绍
-
APK 优化包体大小
-
APK 多渠道打包
-
APK 一键打包脚本
-
IPA 优化包体大小
-
IPA 无签名打包
-
IPA 一键打包脚本
脚本地址
安卓
APK 优化包体大小
- 优化图片等资源大小,删除无用资源
- 只选择保留必要的 so 库。第三方 SDK 也尽量只里保留必要的 so 库,优化后的包体至少减少几十兆
参考修改 android/app/build.gradle 文件
buildTypes { release { ndk{ //"armeabi","armeabi-v7a","arm64-v8a","x86_64","x86" //x86 是兼容模拟器的 abiFilters "armeabi","armeabi-v7a","arm64-v8a" //手机没什么 x86 框架的,只包含 arm32 和 arm64 即可 } } } 安卓多渠道配置与打包
一、原理与介绍
- 从 Flutter v1.17 开始,Flutter 命令工具增加了自定义参数的功能 --dart-define ,我们可以用这个命令参数在打包或运行 App 时设置参数。这样我们就能在 Flutter 代码和原生代码中获取传过来的参数,从而实现多渠道功能。
- 假设我们设置 5 个渠道 1 、应用宝,2 、华为商店,3 、小米商店,4 、OPPO 商店 5 、VIVO 商店
二、Flutter 代码配置
1 、获取参数
配置文件路径:lib/main.dart
/// 这里定义环境变量配置 class EnvironmentConfig { static const CHANNEL = String.fromEnvironment('CHANNEL'); //DEBUG = Y 是调试模式,其他为生产模式 static const DEBUG = String.fromEnvironment('DEBUG'); } 2 、任意的地方使用参数
#获取 CHANNEL 参数值 String appMarket = EnvironmentConfig.CHANNEL ; #获取 DEBUG 参数值 String debug = EnvironmentConfig.DEBUG ; 三、Android 代码配置
1 、获取参数
配置文件路径:android/app/build.gradle
/// 获取渠道参数使用,这里设置一下默认值 def dartEnvirOnmentVariables= [ CHANNEL: 'YYB', DEBUG: '', ] if (project.hasProperty('dart-defines')) { dartEnvirOnmentVariables= dartEnvironmentVariables + project.property('dart-defines') .split(',') .collectEntries { entry -> def pair = URLDecoder.decode(entry).split('=') [(pair.first()): pair.last()] } } 2 、使用
配置文件路径:android/app/build.gradle
//例子:打包 APK 时修改文件名带上渠道参数,还有一些 SDK 也可以通过这种方式设置参数 //dartEnvironmentVariables.CHANNEL 使用参数 android{ android.applicationVariants.all { variant -> variant.outputs.all { output -> def outputFile = output.outputFile if (outputFile.name.contains("release")) { outputFileName = "APP_${getDateTime()}_${dartEnvironmentVariables.CHANNEL}.apk" } } } } 四、多渠道调试与打包指令
# 调试例子 1:设置渠道为应用宝。 flutter run --dart-define=CHANNEL=YYB # 调试例子 2:设置渠道为应用宝。DEBUG 参数是 Y flutter run --dart-define=CHANNEL=YYB --dart-define=DEBUG=Y #打包例子 1:打包应用宝渠道包 flutter build apk --dart-define=CHANNEL=YYB #打包例子 2:打包应用宝渠道包,DEBUG 参数是 Y flutter build apk --dart-define=CHANNEL=YYB --dart-define=DEBUG=Y 安卓一键打包脚本
一、简单介绍
通过上面的配置和优化后我们就能开始执行脚本打包了,本脚本主要实现了以下功能
- 可控制是否执行 flutter clean 清理指令(回车或者 5 秒无指令输入默认不清理)
- 可控制只打某个渠道包或者全部渠道包(回车或者 5 秒无指令输入默认打全部包)
- 可设置渠道种类数组,可无限扩展
- 成功打包后自动打开文件夹
- 实现无人值守打包
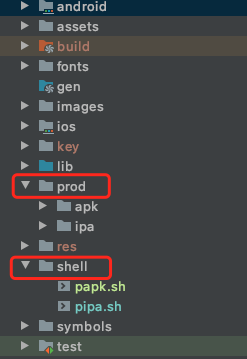
二、项目路径结构
1 、shell 目录存放脚本文件 ,papk.sh 是安卓脚本
2 、prod 目录导出打包文件
三、脚本内容
#!/bin/sh #---------------------必须修改:渠道数组----------------# channels=(YYB HUAWEI MI OPPO VIVO) #当前工程绝对路径 project_path=$(pwd) #安卓包 product 文件夹路径 prod_path=${project_path}/prod/apk/ #Flutter 打包生成的最初地址 release_path=${project_path}/build/app/outputs/apk/release/ clean_tips="执行 flutter clean(默认:n) [ y/n ]" echo $clean_tips read -t 5 is_clean if [ ! -n "${is_clean}" ];then is_clean="n" fi while([[ $is_clean != "y" ]] && [[ $is_clean != "n" ]]) do echo "错误!只能输入[ y/n ] !!!" echo $clean_tips read is_clean done tips="请输入选择渠道(默认:0) [ ALL: 0 " c_length=${#channels[@]}; for(( i=0; i<$c_length; i++)) do if (($i < $c_length-1 )); then tips="${tips}${channels[i]}: $((i+1)) " else tips="${tips}${channels[i]}: $((i+1)) ]" fi done; echo $tips read -t 5 number if [ ! -n "${number}" ];then number=0 fi while(( $number < "0" || $number > $c_length )) do echo "错误!只能输入 0 到${c_length} !!!" echo $tips read number done #如果有 product/apk 文件夹则删除,然后再创建一个空文件夹 if [ -d ${prod_path} ]; then rm -rf ${prod_path} fi #创建目录 mkdir -p ${prod_path} if [ ${is_clean} = "y" ];then echo "=============== 开始清理 ===============" flutter clean fi if (($number == 0 )); then echo "=============== 开始构建:全部渠道包 ===============" for(( i=0;i<${c_length};i++)) do echo "正在构建:${channels[$i]} 渠道包" flutter build apk --no-shrink --dart-define=CHANNEL=${channels[$i]} cp -R ${release_path}*.apk ${prod_path} done; else echo "=============== 正在构建:${channels[$((number-1))]} 渠道包 ===============" flutter build apk --no-shrink --dart-define=CHANNEL=${channels[$((number-1))]} cp -R ${release_path}*.apk ${prod_path} fi #判断 apk 目录下是否有文件 if [ "$(ls -A $prod_path)" ]; then echo "=============== APK 包已导出:$prod_path ===============" open $prod_path else echo '=============== APK 包导出失败 ===============' exit 1 fi exit 0 四、脚本使用步骤
- 1 、在项目根目录创建一个 shell 文件夹
- 2 、在 shell 目录创建 papk.sh 文件,并粘贴脚本内容。修改 channels 渠道数组变量值为自己的,然后保存脚本
- 3 、项目根目录执行命令添加执行权限:chmod u+x shell/papk.sh
- 4 、项目根目录执行命令:./shell/papk.sh
苹果
优化包体大小
一、常规优化(分发到 App Store 或者 打 Ad hoc 测试包)
- 优化图片等资源大小,删除无用资源,比较简单,而且对于一般的 app 来说优化效果不大,这里就不详细说明了。
- 只选择保留必要的指令集类型。xcode 12 以上默认是包含 armv7 和 arm64 位两种指令集。我们打 Release 包时可以排除 armv7 指令集。只保留 arm64 指令集就可以了 看图操作:

** 如果担心兼容性的,下面再附一张指令集对应手机型号的图 **

二、非常规优化
一般情况下我们使用 xcode 分发的时候,xcode 还会帮我们优化一次代码大小的,包体大概能减少一半以上。然鹅,如果需要自己导出一个无签名的 IPA 包时我们应该怎么优化包体大小?下面是我总结的操作步骤
1 、Flutter 导出 IPA (共 4 步)
- 执行 flutter build ios --release 生成 Runner.app 文件
- 在 Runner.app 目录下新建一个 Payload 文件夹, 并将该 app 拖进去
- 右键->压缩"Payload"为 Payload.zip
- 将生成的 Payload.zip 文件更名为 xxx.ipa 即可得到 ipa 安装包
2 、第一次优化包体大小(共 5 步)
上面生成的 ipa 大的离谱。动不动就几百兆。所以,我们需要利用 Xcode 来帮忙优化一下 Runner.app 。总体步骤比上面的打包多了一步。
- 执行 flutter build ios --release 生成 Runner.app 文件
- 使用 xcode 打开项目,然后点击 product->build 。成功后生成一个新的 Runner.app 。
- 在 Runner.app 目录下新建一个 Payload 文件夹, 并将该 app 拖进去
- 右键->压缩"Payload"为 Payload.zip
- 将生成的 Payload.zip 文件更名为 xxx.ipa 即可得到 ipa 安装包
一顿操作后,包体大概能减少几十或者上百兆。看着很可观,但是由于原来的包实在太大,即使减了这么多,可能最终还有一百来兆。
3 、第二次优化包体大小(共 6 步)
- 执行 flutter build ios --release 生成 Runner.app 文件
- 使用 xcode 打开项目,然后点击 product->build 。成功后生成一个新的 Runner.app 。
- Runner.app 目录下执行指令:xcrn bitcode_strip Runner.app/Frameworks/Flutter.framework/Flutter -r -o Runner.app/Frameworks/Flutter.framework/Flutter
- 在 Runner.app 目录下新建一个 Payload 文件夹, 并将该 app 拖进去
- 右键->压缩"Payload"为 Payload.zip
- 将生成的 Payload.zip 文件更名为 xxx.ipa 即可得到 ipa 安装包
再一顿操作下来后,包体大概又能减少几十或者上百兆。终于基本优化到一百兆以内,接近用 Ad hoc 分发的 ipa 包的大小
4 、一些说明
1 、Flutter 生成 Runner.app 比较大的原因
ios 的 Flutter 二进制文件增加了对 bitcode 的支持,从而导致体积增大
2 、 如何优化
执行 xcrun bitcode_strip 指令就能去掉 bitcode
xcrun bitcode_strip 指令大家可以自行网上搜索。详细的使用我就不细说了
苹果一键打包脚本
一、简单介绍
通过上面的”常规优化“后我们就能开始执行脚本打包了,本脚本主要实现了以下功能
- 可控制是否执行 flutter clean 清理指令(回车或者 5 秒无指令输入默认不清理)
- 可控制选择打无签名包还是 Ad hoc 测试包(回车或者 5 秒无指令输入默认无签名包)
- 成功打包后自动打开文件夹
- 实现无人值守打包
- 如果要导出无签名包,脚本中添加了”非常规的优化“相关的操作
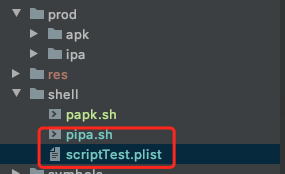
二、项目路径结构
1 、shell 目录存放脚本和 plist 文件,pipa.sh 是苹果脚本,
2 、prod 目录导出打包文件
三、脚本内容
#!/bin/sh #当前工程绝对路径 project_path=$(pwd) #xCode build 出来的 APP 文件有所优化,比 Flutter build ios 的 Runner.app 要小 #------------------必须修改:XCODE 工程导出路径----------------# runner_path=~/Library/Developer/Xcode/DerivedData/Runner-bsrdqyyshhsictbeoknvquvcxcsm/Build/Products/Release-iphoneos/Runner.app #-------------------可选:自己的 plist 配置路径------------------# export_plist_path=${project_path}/shell/scriptTest.plist #-------------------可选:修改为自己的 APP 名称------------------# app_name="APP 名称" #----------------可选:将 Runner 替换成自己的工程名---------------# project_name=Runner #----------------可选:将 Runner 替换成自己的 sheme 名--------------# scheme_name=Runner #打包模式 Debug/Release development_mode=Release #导出.ipa 文件所在路径 ipa_path=${project_path}/prod/ipa/ #导出签名.ipa 文件所在路径 sign_path=${ipa_path}/sign #导出未签名.ipa 文件所在路径 unsign_path=${ipa_path}/unsign #导出未签名.Payload 文件所在路径 payload_path=${unsign_path}/Payload clean_tips="执行 flutter clean(默认:n) [ y/n ]" echo $clean_tips read -t 5 is_clean if [ ! -n "${is_clean}" ];then is_clean="n" fi while([[ $is_clean != "y" ]] && [[ $is_clean != "n" ]]) do echo "错误!只能输入[ y/n ] !!!" echo $clean_tips read is_clean done echo "请输入选择模式(默认:0) [ UnSign: 0 AdHoc: 1 ] " read -t 5 number if [ ! -n "${number}" ];then number=0 fi while([[ $number != 0 ]] && [[ $number != 1 ]]) do echo "错误!只能输入 0 或者 1 !!!" echo "请输入选择模式? [ UnSign: 0 AdHoc: 1 ] " read number done if [ ${is_clean} = "y" ];then echo "=============== 开始清理 ===============" flutter clean fi echo "=============== 构建 FLUTTER_IOS 工程 ===============" if [ $number == 0 ];then flutter build ios --release --no-codesign else flutter build ios fi #flutter build ios --release --no-codesign --obfuscate --split-debug-info=./symbols #如果有 product/ipa 文件夹则删除,然后再创建一个空文件夹 if [ -d ${ipa_path} ]; then rm -rf ${ipa_path} fi #创建目录 mkdir -p ${ipa_path} #rm -rf ${ipa_path} if [ $number == 0 ];then #无签名打包 echo "=============== 正在编译 XCODE 工程:${development_mode} ===============" xcodebuild build -workspace ios/${project_name}.xcworkspace -scheme ${scheme_name} -configuration ${development_mode} mkdir -p ${payload_path} cp -r ${runner_path} ${payload_path} cd ${unsign_path} echo "=============== 读取 APP 信息 ===============" #info.plist 路径 info_plist="Payload/Runner.app/info.plist" version=$(/usr/libexec/PlistBuddy -c "Print CFBundleShortVersionString" "$info_plist") build=$(/usr/libexec/PlistBuddy -c "Print CFBundleVersion" "$info_plist") time=$(date "+%Y%m%d_%H%M") appName="$app_name""_v$version""_b$build""_$time.ipa" echo "=============== 优化 Framework 大小 ===============" xcrun bitcode_strip ${payload_path}/Runner.app/Frameworks/Flutter.framework/Flutter -r -o ${payload_path}/Runner.app/Frameworks/Flutter.framework/Flutter xcrun bitcode_strip ${payload_path}/Runner.app/Frameworks/AgoraRtcKit.framework/AgoraRtcKit -r -o ${payload_path}/Runner.app/Frameworks/AgoraRtcKit.framework/AgoraRtcKit xcrun bitcode_strip ${payload_path}/Runner.app/Frameworks/App.framework/App -r -o ${payload_path}/Runner.app/Frameworks/App.framework/App echo "=============== 生成 IPA(压缩 Payload 文件并修改文件名为 IPA) ===============" zip -r ${appName} * if [ -e $unsign_path/$appName ]; then echo "=============== IPA 包已导出:$unsign_path/$appName ===============" open $unsign_path else echo '=============== IPA 包导出失败 ===============' exit 1 fi else #Ad hoc 打包 echo "=============== 正在编译工程:${development_mode} ===============" xcodebuild \ archive -workspace ${project_path}/ios/${project_name}.xcworkspace \ -scheme ${scheme_name} \ -configuration ${development_mode} \ -archivePath ${ipa_path}/${project_name}.xcarchive -quiet || exit echo '' echo '=============== 开始 IPA 打包 ===============' xcodebuild -exportArchive -archivePath ${ipa_path}/${project_name}.xcarchive \ -configuration ${development_mode} \ -exportPath ${sign_path} \ -exportOptionsPlist ${export_plist_path} \ -quiet || exit if [ -e $sign_path/$app_name.ipa ]; then echo "=============== IPA 包已导出:$sign_path/$app_name.ipa ===============" open $sign_path else echo '=============== IPA 包导出失败 ===============' exit 1 fi fi exit 0 四、plist 文件
<?xml version="1.0" encoding="UTF-8"?> <!DOCTYPE plist PUBLIC "-//Apple//DTD PLIST 1.0//EN" "http://www.apple.com/DTDs/PropertyList-1.0.dtd"> <plist version="1.0"> <dict> <key>compileBitcode</key> <true/> <key>destination</key> <string>export</string> <key>method</key> <string>ad-hoc</string> <key>signingCertificate</key> <string>XXXXXXXX</string> <key>signingStyle</key> <string>automatic</string> <key>stripSwiftSymbols</key> <true/> <key>teamID</key> <string>XXXXXX</string> <key>thinning</key> <string><none></string> </dict> </plist> 五、脚本使用步骤
 | 1 DingJZ 2022-03-16 17:12:53 +08:00 之前用 fastlane 做了一套类似的流程,我的感觉 fastlane 相对来说好维护一些,环境变量之类的也更好控制 不过也主要是我实在写不来 shell |

 | 3 yy1300326388 2022-03-22 14:59:55 +08:00 shell 脚本太麻烦了,可以看看这个 https://github.com/leanflutter/flutter_distributor/blob/main/README-ZH.md |
| 4 yy1300326388 2022-03-22 15:00:59 +08:00 我之前是用 shell ,现在用这个啦,fastlane 也取代了,打包完毕后上传到蒲公英、fir 、App Store 都支持 |